Gmail from Google, is one of the most used free email service at present times in the world. Gmail has almost 30% share in global email client market. Gmail interface is easy to use but voice recognition technology can make it even easier and faster to use. In this tutorial, you will find out how to use Gmail using voice commands using Braina voice assistant software. You will learn how to open Gmail client, compose email, dictate email, send email, read emails, search emails and navigate in the Gmail client on PC using voice commands. Braina will not only help you to voice control Gmail but it will also help you to type emails by speaking in most of the languages of the world!
In order to operate Gmail using voice commands, you will first have to download and install Braina Pro on your computer. Please note that Braina works on Windows PC and this tutorial demonstrates how to voice control various tasks in Gmail on Windows OS and not on Mac, Android or iOS. Please proceed with the tutorial once Braina Pro is set up and activated.
Enabling Gmail keyboard shortcuts
Gmail has a long list of keyboard shortcuts which are disabled by default. The first thing which we need to do is to enable keyboard shortcuts so that we can control Gmail using custom voice commands. Please open https://mail.google.com and when the web page gets loaded, press Shift+? keys together. This will open a popup showing Gmail keyboard shortcut list. Scroll down a bit to find an “Enable” link besides the text “The following keyboard shortcuts are currently disabled.” as shown in image below. Click on the “Enable” link to enable the keyboard shortcuts.

List of Gmail Keyboard shortcuts
Here is a list of Gmail keyboard shortcuts. As mentioned earlier, we can also see this list by pressing Shift+? keys together in Gmail window. We will use these shortcuts to create custom voice commands in Braina.
Compose and Chat
| Action | Shortcut |
|---|---|
| Previous message in an open conversation | p |
| Next message in an open conversation | n |
| Focus main window | Shift + Esc |
| Focus latest chat or compose | Esc |
| Advance to the next chat or compose | Ctrl + . |
| Advance to previous chat or compose | Ctrl + , |
| Send | Ctrl + Enter |
| Add cc recipients | Ctrl + Shift + c |
| Add bcc recipients | Ctrl + Shift + b |
| Access custom from | Ctrl + Shift + f |
| Insert a link | Ctrl + k |
| Open spelling suggestions | Ctrl + m |
Text Formatting
| Action | Shortcut |
|---|---|
| Previous font | Ctrl + Shift + 5 |
| Next font | Ctrl + Shift + 6 |
| Decrease text size | Ctrl + Shift + – |
| Increase text size | Ctrl + Shift and + |
| Bold | Ctrl + b |
| Italics | Ctrl + i |
| Underline | Ctrl + u |
| Numbered list | Ctrl + Shift + 7 |
| Bulleted list | Ctrl + Shift + 8 |
| Quote | Ctrl + Shift + 9 |
| Indent less | Ctrl + [ |
| Indent more | Ctrl + ] |
| Align left | Ctrl + Shift + l |
| Align center | Ctrl + Shift + e |
| Align right | Ctrl + Shift + r |
| Remove formatting | Ctrl + \ |
Actions
| Action | Shortcut |
|---|---|
| Move focus to toolbar | , |
| Select conversation | x |
| Toggle star/rotate among superstars | s |
| Archive | e |
| Mute conversation | m |
| Report as spam | ! |
| Delete | # |
| Reply | r |
| Reply in a new window | Shift + r |
| Reply all | a |
| Reply all in a new window | Shift + a |
| Forward | f |
| Forward in a new window | Shift + f |
| Update conversation | Shift + n |
| Archive conversation and go previous/next | ] or [ |
| Undo last action | z |
| Mark as read | Shift + i |
| Mark as unread | Shift + u |
| Mark unread from the selected message | _ |
| Mark as important | + or = |
| Mark as not important | – |
| Snooze
Note: This shortcut isn’t available in classic Gmail. |
b |
| Expand entire conversation | ; |
| Collapse entire conversation | : |
| Add conversation to Tasks | Shift + t |
Jumping
| Action | Shortcut |
|---|---|
| Go to Inbox | g + i |
| Go to Starred conversations | g + s |
| Go to Sent messages | g + t |
| Go to Drafts | g + d |
| Go to All mail | g + a |
| Go to Tasks | g + k |
| Go to label | g + l |
Threadlist selection
| Action | Shortcut |
|---|---|
| Select all conversations | * + a |
| Deselect all conversations | * + n |
| Select read conversations | * + r |
| Select unread conversations | * + u |
| Select starred conversations | * + s |
| Select unstarred conversations | * + t |
Navigation
| Action | Shortcut |
|---|---|
| Go to next page | g + n |
| Go to previous page | g + p |
| Back to threadlist | u |
| Newer conversation | k |
| Older conversation | j |
| Open conversation | o or Enter |
| Go to next Inbox section | ` |
| Go to previous Inbox section | ~ |
Application
| Action | Shortcut |
|---|---|
| Compose | c |
| Compose in a new tab | d |
| Search mail | / |
| Search chat contacts | g |
| Open “more actions” menu | . |
| Open “move to” menu | v |
| Open “label as” menu | l |
| Open keyboard shortcut help | ? |
Voice Command Modes and Inbuilt commands
There are few voice commands which are built in Braina which can be used to open and close Gmail. To give voice commands, we have to first make sure that Braina is in command mode. Braina has two modes for speech recognition.
- Command Mode: Command mode is the default mode of Braina. When Braina is in command mode, whatever you speak is interpreted as a command for Braina. This is the default mode when Braina starts but if you have shifted to Dictation mode then you can come back into command mode by typing or speaking “Dictation mode off” (without quotes). Alternatively, you may also click on the D icon on the menubar to change mode or press Alt+D keys together while Braina’s window is in focus.
- Dictation Mode: Dictation mode is used to dictate into third party applications or websites. When Braina is in dictation mode, whatever you speak is typed in the text-field of the software or website which has focus. We will use this mode when we need to type email. You can enable dictation mode by typing or speaking “Dictation mode on” (without quotes). Alternatively, you may also click on the D icon on the menubar to change mode.
Make sure that Braina is in command mode and click on the microphone button on the bottom right side of Braina’s window to make Braina listen to you. You can also alternatively press Ctrl+Alt+L keys together while focus is on Braina’s window to start speech recognition.
Open Gmail
Use this command to open Gmail client in your default web browser.
Close Gmail
Use this command to close Gmail window. If this command doesn’t work for you, you can use close tab or close window command while Gmail window is in focus.
Creating voice commands for Gmail
We will create custom voice commands to automatically press the keystrokes as per the list of Gmail keyboard shortcuts mentioned above to perform various tasks. Please go through following article: Keyboard Automation using Braina
Compose email
For an example, we will create a custom command “Compose email”. This voice command will open the window to create new email. The keyboard shortcut to compose new email is c key so we will create command to press c key. Please follow the steps given below to create compose email command.
- Go to Tools menu -> Custom Commands in Braina
- Click on the “+” (plus sign) button.
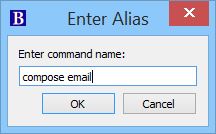
- It will ask you to enter command name. Enter “compose email” (without quotes) and click on OK button.
- Now it will ask you to enter command value that you want to be executed when “compose email” is spoken. We want Braina to press c key so we will write “press c” (without quotes) and click on OK button.

Done. Now we just need to speak compose email while Gmail’s window is in focus and window to create new email will get open.
How to dictate an email in Gmail?
We have created “compose email” voice command to create new email. Now we can use Braina’s speech to text dictation feature to type email by speaking. Please follow steps below to dictate your message.
- To utilize voice typing feature, you will have to enable dictation mode. Say “dictation mode on” to enable dictation mode. When you compose new email, the focus will be on To (Recipient) field by default. Speak the email address of the recipient or simply type the email address as typing will be easier because of auto-completion feature if the contact is stored.
- Now speak Tab to move to the mouse pointer to subject field and speak the email’s subject. What you speak will get typed.
- Speak “Tab” again to navigate to field to type the body of message. Speak the message you want to send and it will get typed. Please note that default language of speech recognition is English. You can change language from the drop down present in the bottom of the speech recognition pop up window.
Sending email
Ctrl+Enter is the keyboard shortcut to send email in Gmail. Since we have enabled dictation mode while dictating email, we will first need to enable command mode to make our voice command work. So say “dictation mode off” to turn off Dictation mode.
Perform steps to create a new custom command as mentioned in the Compose email section above. In the alias name, we will enter “send email” (without quotes) and in command value we will enter “press ^(~)” (without quotes) and click on Ok. Done. “send email” voice command is now ready to be used.
Navigating, Searching, Deleting and Reading Emails
To search mails we can create a command “Search email” with value “press /” (without quotes). When you speak this command, the search email field will get focused. Now instead of disabling command mode and switching to dictation mode, you can make use of “type” command. type command can be useful when we need to dictate a phrase or small sentence while being in command mode and save time by avoiding switching to dictation mode. For example, if we want to search emails with keyword “appointment”, say “search email” and when the search mail field is focused, say “type appointment”. You will notice that “appointment” gets typed in the search bar but the search is not done. This is because we have not pressed the Enter key. To make it work we will create a “press enter” command with value “press ~”. Now you can speak “press enter” voice command to automate pressing of Enter key and search the needed emails.
Please create following custom voice commands for performing various tasks:
| Command Name | Command Value |
|---|---|
| Press enter | press ~ |
| Next email | press k |
| Previous email | press j |
| Next message | press n |
| Previous message | press p |
| Inbox folder | press g{Delay 500}i |
| Sent folder | press g{Delay 500}t |
| Draft folder | press g{Delay 500}d |
| Delete this email | press # |
| Select conversation | press x |
| Reply to email | press r |
| Select all | press ^(a) |
| Copy | press ^(c) |
| Read this | press {APPACTIVATE Human Language Interface} {DELAY 500}^(%c)minimize window~ |
| Read this email | press ^(a){DELAY 200}^(c){APPACTIVATE Human Language Interface} {DELAY 500}^(%c)minimize window~ |
Note: Depending on your accent, you may also need to create additional voice commands if the speech recognition does not understand your speech correctly. For example, you can also create “draught folder” command with same value as “draft folder” command if the word “draft” is recognized as “draught”.
Next email or previous email command will take you to next or previous email in the email list while next message or previous message will take you to the next message or previous message within an email thread.
Most of these gmail voice commands are quite self explanatory. Feel free to comment below if you are facing any issue.
Reading emails with Text to Speech (TTS)
If you want Braina to read the email for you can select and copy the text to be read and speak “read this”. Alternatively, you can simply speak “read this email” to read all text in the email. Braina will read the email for you. Please note that the email should be open and you must have created these custom voice commands as shown in the table above.
Explanation of working of read this email command:
- press ^(a) – press Ctrl+a (Selects all text in current window)
- {DELAY 200} – Give some time (200 ms) to the system to select text
- ^(c) – press Ctrl+c (copy selected text)
- {APPACTIVATE Human Language Interface} {DELAY 500} – Activate Braina’s window
- ^(%c) – press Ctrl+Alt+c (Activate Braina’s read copied text function)
- minimize window~ – types “minimize window” in Braina and press Enter to execute the command and minimize Braina’s window
This tutorial demonstrates how to use voice commands with Gmail. Similarly, you can also create other voice commands based on the keyboard shortcut list given above or you can also create voice commands for various other email clients such as Outlook, Yahoo! Mail, Hotmail etc. Feel free to comment below if you need any help or if you have created an interesting voice command with Braina that you want to share with us.
testing dictation